ダウンロード iVinci Express
投稿者 Phyar Studio
- カテゴリ: Graphics & Design
- 現在のバージョン: 4.65
- ファイルサイズ: 6.31 MB
- 互換性: iOSが必要です Windows 11, Windows 10/8/7/Vista
投稿者 Phyar Studio

APK -PC用 - ダウンロード
| ダウンロード | 開発者 | 評価 | ファイルサイズ (MB) |
|---|---|---|---|
| ダウンロード Apk | Adobe | 1748016 | Varies with device |
OK。 最初のものが最初に。 お使いのコンピュータでアプリケーションを使用するには、まずMacストアまたはWindows AppStoreにアクセスし、Bluestacksアプリまたは Nox App Web上のチュートリアルのほとんどはBluestacksアプリを推奨しています。あなたのコンピュータでBluestacksアプリケーションの使用に問題がある場合は、簡単にソリューションをオンラインで見つける可能性が高くなるため、推奨するように誘惑されるかもしれません。 Bluestacks PcまたはMacソフトウェアは、 ここ でダウンロードできます。.
あなたが選択したエミュレータをダウンロードしたので、コンピュータのダウンロードフォルダに移動して、エミュレータまたはBluestacksアプリケーションを探します。
見つかったら、クリックしてアプリケーションまたはexeをPCまたはMacコンピュータにインストールします。
[次へ]をクリックして、ライセンス契約に同意します。
アプリケーションを正しくインストールするには、画面の指示に従ってください。
上記を正しく行うと、エミュレータアプリケーションが正常にインストールされます。
これで、インストールしたエミュレータアプリケーションを開き、検索バーを探します。 一度それを見つけたら、 iVinci Express を検索バーに入力し、[検索]を押します。 クリック iVinci Expressアプリケーションアイコン。 のウィンドウ。 iVinci Express - Playストアまたはアプリストアのエミュレータアプリケーションにストアが表示されます。 Installボタンを押して、iPhoneまたはAndroidデバイスのように、アプリケーションのダウンロードが開始されます。 今私達はすべて終わった。
「すべてのアプリ」というアイコンが表示されます。
をクリックすると、インストールされているすべてのアプリケーションを含むページが表示されます。
あなたは アイコン。 それをクリックし、アプリケーションの使用を開始します。
こんにちは。 Macユーザー!
使用する手順 iVinci Express - Macの場合は、上記のWindows OSのものとまったく同じです。 Nox Application Emulator をインストールするだけです。 あなたのMacintosh上のBluestack。 ここ で入手できます。
iVinci Express iTunes上で
| ダウンロード | 開発者 | 評価 | スコア | 現在のバージョン | アダルトランキング |
|---|---|---|---|---|---|
| 無料 iTunes上で | Phyar Studio | 4.65 | 4+ |
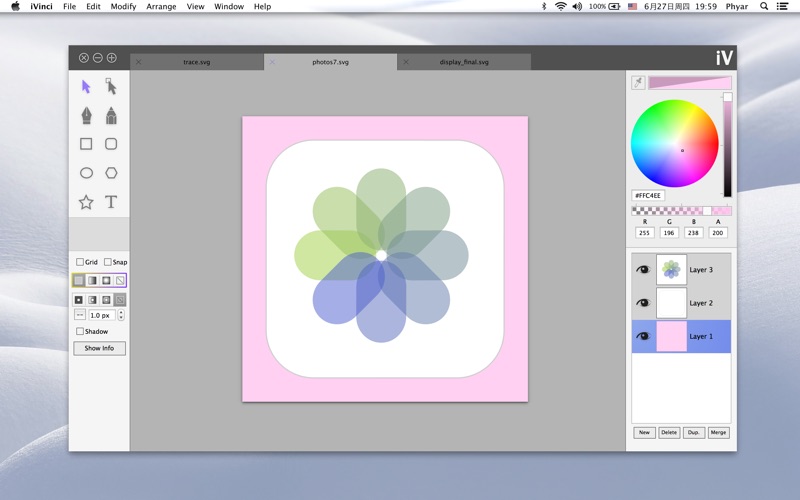
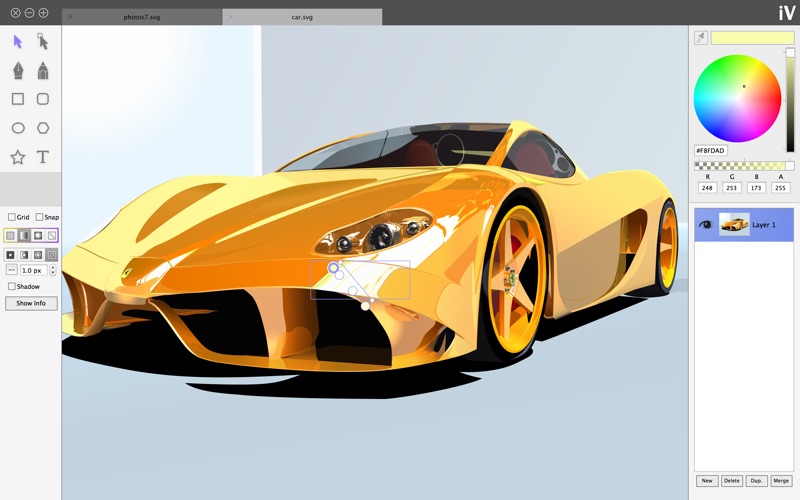
iVinci is a new starting point in vector design industry. It's just incredibly easy, and incredibly fast, for both beginners and experts. You can watch the amazing videos on our web site. Notable features: -Use SVG as native file format. You can use files created by iVinci directly in may other Apps. -Powerful Bezier path edit system. -Directly gradient editor embedded on the objects, differently and much easier compare from what you have ever used. -Easy to use style controller. -Navigate the document like viewing a map. (Mouse wheel to zoom, Right Mouse button drag to move) -Completely Retina display support. -OpenGL hardware rendering support, incredibly fast. Other features: -Path boolean operation. -Pen and Pencil tool. -Basic shapes. -Text. Convert text to path. -Gradient for both stroke and fill. -Dashs and arrows. -Grid, snap to grid. -Shadow effect. -Image filling in paths. -Make compound paths. -Make mirror objects. -Layers control, and you are allowed to select multiple layers. -Object sequence control. -Alignment. ...And much more! Important Tips: -Use mouse wheel or Pinch on trackpad to zoom in/out. -Right mouse drag or slide with two fingers on trackpad to move the canvas, aka. Hand Tool. -Double Click to switch from object drawer to object selector. -Double Click on any object to switch between object selector and point selector. -Press and hold "alt" key to move the tangent point individually. If the curve is not smooth at the point, you do not have to press "alt" key. -Press and hold "shift" or "command" key to select multiple objects with object selector. -Press and hold "shift" or "command" key to select multiple points with point selector. -Press and hold "shift" or "command" key to select multiple layers. -To add new control point on the path, select object with point selector, right button click on the position you want to place the new point, select "Add Point" menu item. -To make the path smooth or sharp at any control point, select point with point selector, and then right button click to see options. -To make one cuver be straight line, simply remove the tangent point. -To modify gradient, select object with object selector, click gradient type for stroke or fill(even if it is already selected), or right button click on the object and use corresponding menu items. -While editing gradient, both the position of gradient line and position of gradient color is movable. -To change gradient color, select any color item in gradient first, then select color in the color panel. -Use arrow keys to move the selected objects. -Drop image files to iVinci window to import images, Drop SVG files to iVinci window to open it.